

A collection of family photographs can preserve many important moments, but photographs alone do not always explain how those moments connect. Names, dates, relationships, documents, and remembered stories provide the context that turns separate images into a family narrative.
A family storyboard can help you organize those pieces before placing them in a scrapbook, photo book, family tree canvas, or framed display. It provides a simple plan for deciding what story you want to tell, which materials support it, and how to arrange the memories.
What Is a Family Storyboard?
In this guide, a family storyboard is a planning tool—not a separate Photo Family Tree product. It outlines how to arrange photographs, captions, documents, and memories in a meaningful order.
You can create a storyboard on paper, with index cards, in a notebook, or in a simple computer document. Its purpose is to help you see the complete story before creating the finished keepsake.
A family storyboard may focus on:
-
One person’s life
-
A couple’s relationship
-
A wedding or anniversary
-
A family branch
-
Parents, children, and grandparents
-
A reunion or holiday tradition
-
Immigration or migration
-
Military service
-
A family home or community
-
A remembrance project
-
Several generations of family history
Choosing one clear subject helps prevent the project from becoming too broad or difficult to complete.
Decide What Story You Want to Tell
Begin by writing one sentence that describes the purpose of the project.
For example:
-
“This project will preserve our grandparents’ journey and the family they created.”
-
“This book will tell the story of our parents’ wedding and fifty years of marriage.”
-
“This display will connect our children with their parents and grandparents.”
-
“This scrapbook will preserve our annual family reunion traditions.”
Use that sentence as a guide for deciding what belongs in the project. A photograph or document may be important, but if it doesn't support the selected story, you can preserve it in a different project later.
Gather the Materials
Collect the photographs and information that may help tell the story.
Possible materials include:
-
Family portraits
-
Candid photographs
-
Birth, wedding, anniversary, and memorial dates
-
Letters, cards, and handwritten notes
-
Certificates and announcements
-
Recipes and traditions
-
Newspaper clippings
-
Maps and travel records
-
Military or employment records
-
School photographs
-
Reunion programs
-
Quotations and remembered sayings
-
Audio recordings that can be transcribed
-
Stories contributed by relatives
Do not place original historical documents at risk while planning. Use digital scans or copies whenever possible, and store originals carefully.
Identify Every Photograph
Before arranging the storyboard, identify the people and events shown in the photographs.
Record:
-
Full names
-
Family relationships
-
Approximate or confirmed dates
-
Locations
-
Occasions
-
The person who supplied the information
-
Whether any detail remains unconfirmed
Ask relatives to help while people and events can still be identified. If information is uncertain, mark it as approximate rather than guessing.
Arrange the Story in Sections
A storyboard can follow a timeline, but chronological order is not the only option.
You may arrange the story by:
-
Time: Childhood, young adulthood, marriage, parenthood, and later years
-
Generation: Grandparents, parents, children, and grandchildren
-
Family branch: Maternal and paternal relatives
-
Event: Preparations, ceremony, celebration, and memories
-
Theme: Home, work, traditions, service, travel, and milestones
-
Relationship: Couples, siblings, parents, children, and extended family
Give each section a working title. Then place the related photographs, documents, and notes beneath it.
For a paper storyboard, index cards work well because you can rearrange them without changing the original materials.
Pair Photographs with Meaningful Context
Each photograph should contribute something to the story. A short caption can explain:
-
Who appears in the photograph
-
When and where it was taken
-
What was happening
-
Why the moment mattered
-
How the people were related
-
What a relative remembers about the occasion
Instead of writing only “Grandmother at home,” consider a caption such as:
“Evelyn Brooks stands outside the family home in Wilson, North Carolina, in approximately 1952. Her daughter remembered that the front porch was where relatives gathered on Sunday afternoons.”
The second caption preserves information the photograph cannot communicate on its own.
Choose the Right Finished Format
Once you've organized the storyboard, choose a keepsake that fits the type and amount of information you want to preserve.
Personalized Family Tree Canvas
A personalized family tree canvas works well when the primary purpose is to show family photographs, names, dates, relationships, and generations in one visual display.
Different designs support different family capacities and picture arrangements. Review the individual product description before selecting a canvas.
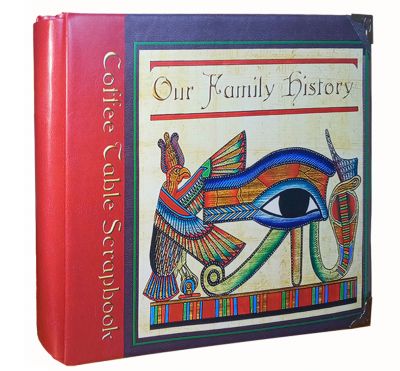
Family-History Scrapbook
A family-history scrapbook provides space for longer stories, letters, recipes, documents, captions, and additional photographs.
A scrapbook may be appropriate when the words and historical materials are as important as the photographs.
Personalized Photo Book
A personalized photo book can present photographs and supporting text in an ordered sequence. It may suit a wedding, journey, reunion, life stage, or another story that unfolds across multiple pages.
Available layouts and personalization features vary by product.
Handcrafted Picture Frame
A handcrafted picture frame can highlight selected photographs from the larger story. Photo Family Tree offers family tree silhouette picture frames and handcrafted wedding picture frames with varying materials, dimensions, and picture capacities.
Review each product description to confirm its current customization, capacity, availability, and fulfillment details.
Keep the Project Manageable
A family-history project does not have to include every photograph or every known relative.
Begin with:
-
One person
-
One couple
-
One family branch
-
One generation
-
One box of photographs
-
One important event
-
One family tradition
Completing a smaller, carefully organized project is often more meaningful than beginning an enormous project that becomes overwhelming.
Organize unused materials for future storyboards and keepsakes.
Invite Relatives to Participate
Family members can contribute different knowledge and perspectives. One person may identify faces, another may remember dates, and someone else may know the story behind an occasion.
Invite relatives to:
-
Identify photographs
-
Confirm names and dates.
-
Contribute written memories
-
Share documents or recipes.
-
Record family sayings and traditions
-
Review captions for accuracy.
-
Suggest important moments to include.
Record who supplied the information, particularly when memories differ or details remain uncertain.
Review the Complete Story
Before creating the final keepsake, review the storyboard from beginning to end.
Ask:
-
Does the order make sense?
-
Are the important people identified?
-
Are names and dates accurate?
-
Does each photograph contribute to the story?
-
Are any sections repetitive?
-
Is important context missing?
-
Is the project appropriate for the selected format?
-
Have original photographs and documents been protected?
This review can prevent mistakes and make the final personalization process easier.
Turn Separate Memories into a Connected Story
A family storyboard gives photographs, documents, and memories a structure. It helps transform separate pieces of family history into a narrative that relatives can understand, preserve, and share.
Begin with one subject, organize the materials, add the context behind the photographs, and choose a keepsake that supports the story you want future generations to know.
Explore Photo Family Tree keepsakes and choose a meaningful format for preserving your family’s story.