

Creating a personalized family tree begins long before you select a design. Gathering accurate names, dates, relationships, and photographs first makes the personalization process easier and helps prevent mistakes in the finished keepsake.
This guide explains how to organize your family information and prepare everything you need before creating a Photo Family Tree.
1. Decide Which Family Members to Include
Begin by deciding whose family story the tree will represent. You may want to create a tree for:
- Your immediate family
- Your maternal or paternal family
- Both sides of a couple’s family
- A wedding or anniversary
- A family reunion
- A memorial or remembrance
- A meaningful gift
Identify the central person, couple, or family before gathering photographs. This will help you determine which relatives and generations belong in the design.
2. Gather Names, Dates, and Relationships
Start with the information you already know. Write down the names of the relatives you plan to include and their relationships to one another.
Depending on the selected design, useful information may include:
- Full names
- Birth dates
- Marriage or anniversary dates
- Memorial dates
- Relationships between family members
- The order of children from oldest to youngest
Ask relatives to confirm uncertain spellings and dates. Family records, photo albums, certificates, obituaries, and previously completed genealogy research may also help.
Names and dates are optional in Photo Family Tree designs. If you leave an available text field blank, that information will not appear on the finished product.
3. Collect and Identify Your Photographs
Gather one clear photograph for each available picture position. Before uploading anything, identify every person and match each photograph with the correct name and generation.
When choosing photographs:
- Select clear images in which the person’s face is visible.
- Avoid photographs that are extremely small, blurry, or heavily damaged.
- Use the best-quality original available whenever possible.
- Check whether a couple should share one heart-shaped picture position.
- Keep a written list matching each photograph to the correct person.
If you scan printed photographs, preserve the original proportions and avoid unnecessary reductions in image quality.
4. Choose a Design with the Right Capacity
Different family tree designs support different numbers of relatives, photographs, and generations. Count your family members before selecting a product.
For example:
- Copper Family Trees can display up to seven children and two parents—nine family members in eight picture positions.
- Bronze Family Trees can display up to seven children, two parents, and four grandparents—13 family members in 12 picture positions.
- The Love Tree can display up to eight children, two parents, and four grandparents—14 family members in 13 picture positions.
- The Custom Rose Family Tree Chart provides an expanded four-generation arrangement with 17 picture positions.
- The Personalized 3 Generation Family Tree collection combines two Bronze canvases and one Copper canvas to represent both sides of a family and the family created together.
Review the individual product description because capacities and arrangements vary by design.
Explore Custom Family Tree Canvases and choose a design that fits the relatives and generations you want to display.
5. Organize Everything Before Personalizing
Create a folder on your computer containing the photographs you intend to use. Rename the files with recognizable names, such as:
- Child-1-Maria
- Child-2-David
- Parents-James-and-Linda
- Paternal-Grandmother
- Maternal-Grandfather
Keep your confirmed names and dates in a separate written list.
Photo Family Tree does not currently allow customers to save an unfinished design and return later. Plan to complete the personalization process in one session. For the easiest experience, use a desktop computer because mobile editing capabilities may be limited.
6. Personalize and Review Your Design
After choosing a product, use the online editor to add the supported photographs, names, and dates.
Before placing your order:
- Confirm that every photograph is in the correct position.
- Check the spelling of every name.
- Verify all dates.
- Review photograph cropping and placement.
- Make sure no important part of a face is cut off.
- Confirm that blank text fields are intentionally blank.
- Review the complete design one final time.
The information you submit is used to prepare the finished product, so review carefully.
7. Preserve Additional Family Stories
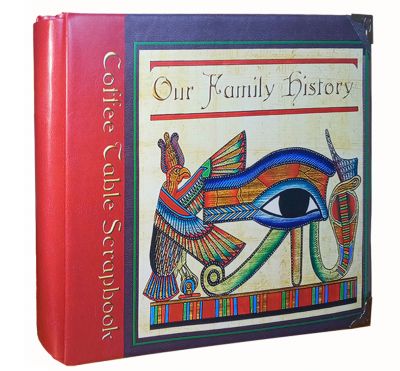
A family tree canvas organizes photographs, names, dates, and relationships into a visual display. Longer stories, documents, traditions, recipes, letters, and additional photographs may be better preserved in a family-history scrapbook.
A scrapbook can complement the family tree by providing space for details that do not fit within the canvas design.
Explore Handcrafted Family History Scrapbooks for another way to preserve photographs and family stories.
Create a Keepsake for Future Generations
Carefully preparing your information helps turn a collection of names and photographs into a meaningful family keepsake. Each photograph represents a person, and each name and date helps preserve that person’s place within the family story.
When your materials are organized and your design is reviewed, your completed Photo Family Tree can become a lasting display that connects generations and keeps family memories visible.
Start creating your personalized family tree.